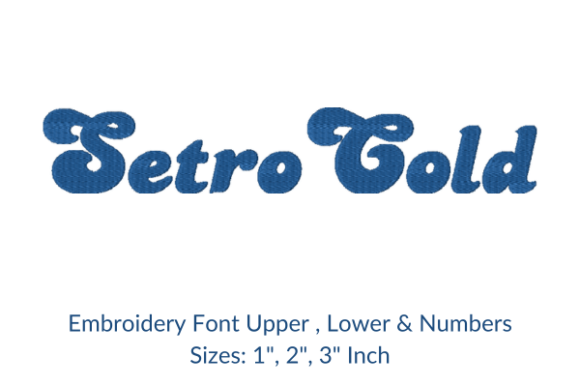
Retro Alphabet Letter U: A Guide to Stylish Vintage Embroidery
There is a distinct satisfaction in seeing a well-executed vintage design come to life on fabric. The Retro Alphabet Letter U captures this feeling perfectly, offering a nostalgic pattern that instantly elevates plain garments into statement pieces. Whether you are a hobbyist looking to personalize a family hoodie or a small business owner creating branded apparel, this specific letter design serves as a cornerstone for retro-themed projects. It brings a curated, 1970s and 80s aesthetic to shirts, jackets, and sweaters, but the path from downloading the file to stitching a flawless result requires more than just enthusiasm.
Many creators dive into embroidery with excitement but overlook the technical nuances that separate a professional finish from a puckered mess. Understanding the intricacies of the Retro Alphabet Letter U Embroidery Design is essential for avoiding wasted thread, damaged stabilizers, and frustrated hours at the machine. This guide focuses on the practical realities of using this design, highlighting common pitfalls and offering actionable solutions to ensure your final product looks as good as the digital preview suggests.
Understanding the Retro Aesthetic and Its Challenges
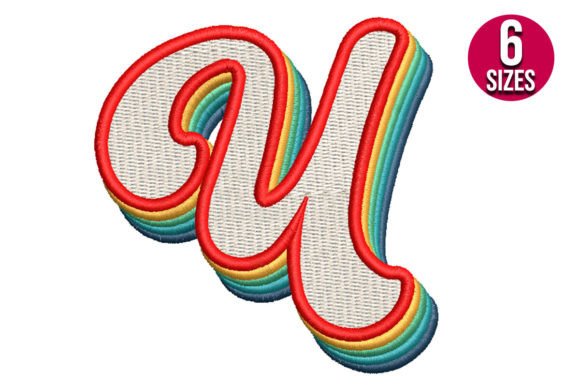
The appeal of the Retro Alphabet Letter U lies in its font choice and decorative elements. Unlike standard block letters, retro fonts often feature curves, serifs, and varying stroke widths that mimic hand-drawn signage or vintage typography. These stylistic choices are what give the design its charm, but they also introduce complexity during the digitizing process. When you select a design like this, you are choosing a pattern that relies heavily on precise stitch density and underlay strategies to maintain its shape.
A common misunderstanding among beginners is assuming that all alphabet designs are created equal. They are not. A simple sans-serif "U" might work fine on a thin cotton t-shirt, but a retro-styled "U" with heavy shading or intricate outlines demands a sturdier approach. If you treat a complex retro design like a basic monogram, the result will likely be distorted. The curves may collapse, or the fill stitches might fail to cover the backing properly, leaving visible gaps that ruin the vintage illusion.
Common Mistakes That Compromise Quality
One of the most frequent errors involves ignoring the fabric type when applying the Retro Alphabet Letter U. Stretchy knits, such as those found in hoodies and sweatshirts, move differently than woven fabrics. If you hoist a stretchy garment without the correct stabilization, the tension from the needle pulling the thread can cause the letter to warp. Instead of a crisp "U," you end up with a wavy, uneven shape that loses its retro integrity. This mistake affects not only the visual presentation but also the durability of the garment, as the stress points can lead to premature tearing.
Another overlooked detail is the size of the design relative to the hoop. While it is tempting to enlarge the Retro Alphabet Letter U to make a bold statement, scaling up an embroidery file too much can degrade the stitch quality. Digitized designs have a limit to how large they can be stretched before the stitch count becomes insufficient to fill the area. This results in a "lacy" look where the background fabric shows through the fill stitches, making the design look cheap rather than premium. Conversely, shrinking the design too small can cause the threads to bunch up, creating a hard, plastic-like texture that sits poorly on soft clothing.
Technical Considerations for Better Results
To avoid these issues, you must evaluate the file formats and machine compatibility before you begin. The Retro Alphabet Letter U Embroidery Design typically comes in multiple formats, such as .PES, .DST, .JEF, or .EXP. Each embroidery machine brand prefers specific formats, and while many modern machines can read several types, forcing a file into an incompatible format can lead to conversion errors. Always verify that the downloaded file matches your machine's native requirements. Using a converted file that wasn't originally optimized for your specific machine can result in incorrect stitch directions or speed issues, leading to thread breaks and skipped stitches.
Stabilizer selection is equally critical. For a retro design with dense fills and sharp turns, a tear-away stabilizer might not provide enough support, especially on textured fabrics like fleece or denim. A cut-away stabilizer is often the better choice for these projects because it remains permanently attached to the back of the fabric, providing continuous support against the pull of the threads. Neglecting this step is a primary reason why vintage-style embroidery fails to hold its shape over time. The weight of the thread and the density of the retro font require a foundation that won't shift.
Evaluating Your Design Before Stitching
Before committing thread and time, take the opportunity to review the digitization details. Look at the stitch count and the estimated running time. A high-quality Retro Alphabet Letter U should have a balanced stitch count that ensures coverage without being overly dense. If the stitch count seems unusually low for the size of the letter, the design may lack necessary underlay stitches. Underlays are the hidden foundation that locks the fabric in place; without them, the top stitches will sink into the material rather than sitting on top, flattening the retro aesthetic.
Furthermore, consider the color palette. Retro designs often rely on specific color combinations to evoke a sense of nostalgia. Using the wrong thread colors can diminish the vintage feel. For instance, pairing a bright neon green with a classic retro font might clash rather than complement. Take time to plan your color sequence and test swatches if you are working on a commercial project. The right colors enhance the design, while the wrong ones can make even the best digitized letter look out of place.
Practical Steps for Success
To ensure your project succeeds, follow a structured approach. First, choose the right fabric and match it with an appropriate stabilizer. Second, verify that your file format is compatible with your machine and has not been improperly resized. Third, run a test stitch on a scrap piece of the same fabric you intend to use. This simple step allows you to adjust tension, check for puckering, and confirm that the Retro Alphabet Letter U retains its intended shape and style.
By paying attention to these details, you transform a simple download into a high-quality addition to your wardrobe or product line. The Retro Alphabet Letter U Embroidery Design offers a unique way to express style, but its potential is only realized when applied with care and technical knowledge. Avoiding common mistakes ensures that your final creation stands the test of time, maintaining its vintage charm wash after wash.
- Select the correct stabilizer: Use cut-away for knits and heavy fabrics to prevent warping.
- Check file compatibility: Ensure the format matches your machine to avoid conversion errors.
- Test before committing: Always stitch a sample to verify density and tension.
- Respect size limits: Do not scale the design beyond its optimal range to maintain stitch quality.
- Plan your colors: Choose threads that align with the retro theme for maximum impact.
With these considerations in mind, you can confidently incorporate the Retro Alphabet Letter U into your next project. Whether you are marking initials on a jacket or creating custom merchandise, a thoughtful approach guarantees a result that honors the nostalgic spirit of the design while meeting modern standards of quality and durability.